What rendering factor should I set?
This question can’t be answered in a few words. First, you should understand what the rendering factor actually is and what purpose it has.
What is the rendering factor?
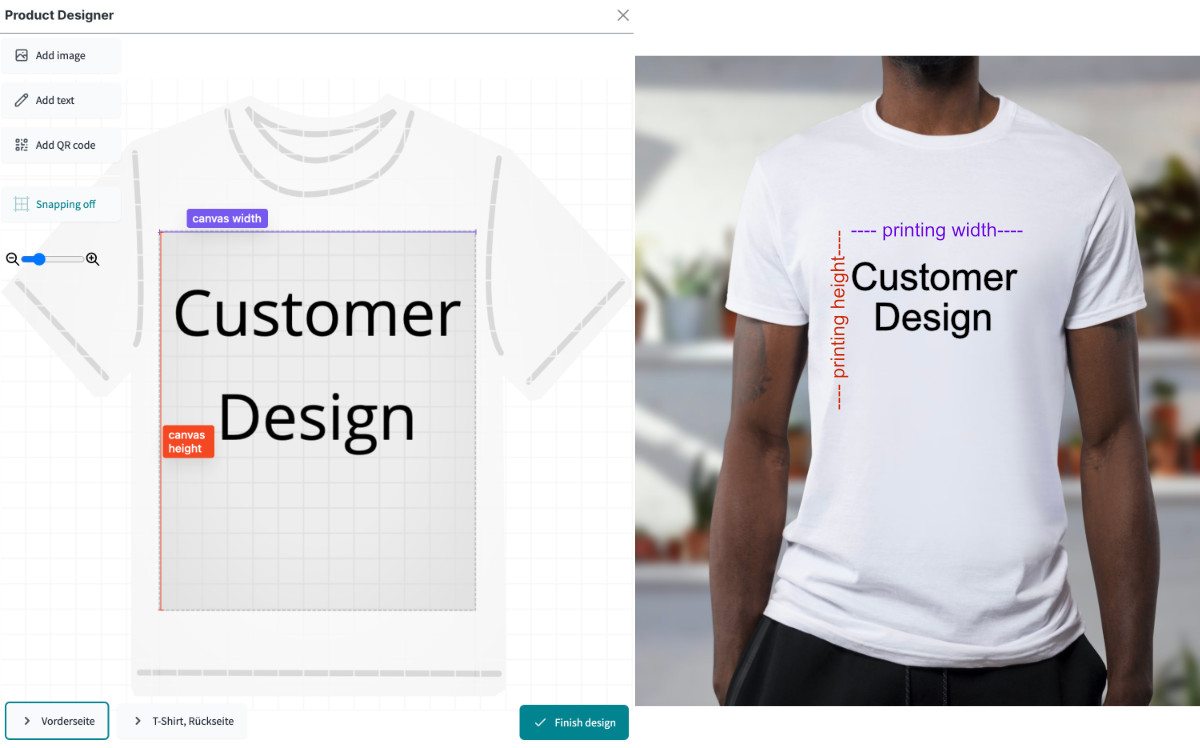
The rendering factor is a number the canvas width and height gets multiplied with before the designs created by your customers are going to be rendered as an export file.
Therefore, the higher the rendering factor, the better the quality of the export file. But also: The higher the rendering factor, the slower the export file generation & the bigger the file size of your exported files.
Let’s assume you have set up a product designer configuration with a canvas width and height of 500 px. Now image a customer uploads one of the his personal photos with a size of 1.000 x 1.000 px into the designer and places it on the canvas.
If the rendering factor is 1, the size of the rendered export file of that design will be equal to the canvas width and height. So it’s 500 x 500 px. Because the image of your customer is bigger it’s inevitable that some pixels will get lost and the quality of the export image will be decreased.
If you set the rendering factor to 2, the rendered export file will have a size of 500 px * 2 = 1.000 px. Therefore, all the pixel information from your customer’s image can be kept and the quality will be better.
How to calculate the best rendering factor?
The rendering factor should be as small as possible, but as high as necessary.
Browsers, HTML, CSS… all the web technology are basically working with pixel values. That’s why the product designer is working with that unit, too. On the contrary, the printing industry often works with units like inches, centimeters etc.
For this reason there’s a conversion factor called DPI, which means “dots per inch” and is the number of pixels per inch.
Let’s assume you want to sell T-Shirts and give your customers the opportunity to create a design for the front side of a T-Shirt with a size of 15 cm x 15 cm. To achieve this you already should have created a product designer configuration with a specific canvas width and height (size of the canvas in the customer’s web browser). Let’s say both the width and height is 600 px.
You now have to decide what quality you want to use for the designs printed on the T-Shirt. A very common quality is 300 DPI.
So, we have the following values:
- a canvas size of 600 px x 600 px
- a printing size of 15 cm x 15 cm
- a DPI of 300
We now have to convert cm into inches. There are a lot of converters online. You also could use Google by just typing: 15 cm in inches into the search field - which will give us 5.91 inches.
We now have to convert the number of inches into pixels using the DPI:
5.91 inches * 300 DPI = 1,772 pixels
That means, our export file should have at least a height and width of 1,772 pixels to have the required quality.
Because the canvas width and height is lower than that, we have to specify the corresponding rendering factor of:
1,772 px / 600 px = 2.95.
It’s only possible to set integers as a rendering factor. So we have to round up the result to 3. That means, for our example the best rendering factor is 3.
Let’s assume the printing size is 30 cm x 30 cm instead and all the other values remain the same. If we like to keep the same quality we need the rendered export files to have a size of
11.82 inches * 300 DPI = 3,546 pixels
Therefore the rendering factor has to be
3,546 px / 600 px = 5.91 ~ 6
Let’s say we want to have a quality of 400 DPI instead, our printing size is 30 cm x 300 cm and all the other values remain the same. In that case the export files need to have a size of
11.82 inches * 400 DPI = 4,728 pixels
So the rendering factor has to be
4,728 px / 600 px = 7.88 ~ 8